
Choosing the right mount Classic Mini Engine Mounts (1959–2000) (and why it matters)
11 May 2026Step-by-step: How to fit 1959–2000 Mini lower engine mounts at home (jack stands + trolley jack)
Important: This is a general home-workshop procedure for the lower engine mounts for Minis & Mokes fitted with manual gearboxes. Minis vary with year, subframe type, and what’s been modified over the last 50+ years—so treat this as a careful guide, and not the only possible method.
Tools + supplies
- Trolley jack + 2 jack stands (rated appropriately)
- Wheel chocks
- Socket set/spanners (commonly 1/2″ AF for 5/16″ UNF/UNC fasteners on most Minis)
- Long extensions + universal joint (helpful)
- Torque wrench
- Penetrating oil (WD-40, CRC & INOX)
- Small Pry bar
- Wood block (to spread load when supporting engine/gearbox)
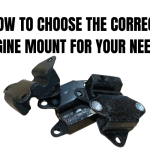
- New Engine Mounts 21A1902 (2 required), and optional fastener Fit Kit 21A1902FK (1 required)
Safety tips (don’t skip this)
- Work on flat, solid ground.
- Chock rear wheels, handbrake on, and leave the car in gear.
- Lift the front and support the car on jack stands placed under solid structure/subframe points—never rely on the trolley jack alone.
- When supporting the engine, use a jack with a wood block to spread load. Don’t concentrate force on the aluminium sump edge.
- Keep fingers clear when aligning mounts—engine movement is sudden and heavy.
Overview of the job (what you’re doing)
Each side typically has:
- 2 bolts fixing the mount to the subframe
- 3 bolts fixing the mount to the engine/gearbox mounting bracket
You’ll support the engine, remove one mount at a time, install the new mount, then repeat for the other side.
Procedure
A) Raise and support the car
- Chock rear wheels place handbrake firmly on
- Jack the front of the car up.
- Place jack stands securely.
- Give the car a firm shake test (it should feel rock solid).
- B) Preparation
- Spray penetrating oil on the mount fasteners (subframe side + engine bracket side).
- Loosen (don’t remove) the mount fasteners while the car is still stable, if access allows.
C) Support the engine/gearbox
- Position the trolley jack under the engine/gearbox area with a wood block.
- Jack up just until you see the engine’s weight taken (you don’t want to lift the car off the stands).
- Watch hoses, exhaust, and radiator area for tension.
D) Remove ONE mount (do one side at a time)
- Undo the 2 bolts to the subframe.
- Undo the 3 bolts to the engine/gearbox bracket.
- Remove the old mount.
- Compare old vs new mount orientation (the mount has an angled form—fit it the same way the old one sat).
E) Fit the new mount (and why captive nuts help)
- Install the new mount into place.
- Start all bolts finger-tight
- If using 21A1902ST (captive/castellated nuts), this is where it shines: you typically don’t have to fight a loose nut while lining up bolts under the car.
- If bolt holes don’t line up:
- slightly raise/lower the jack supporting the engine to relieve bind
- use a pry bar gently to align holes
- never force bolts in cross-threaded
F) Torque the fasteners
- Engine mount to subframe: 16 lb-ft (22 Nm)
- Engine mount to mounting bracket: 16 lb-ft (22 Nm)
- (Related bracket fixings can vary by side/application; one listing shows LH bracket-to-transmission at 18 lb-ft / 25 Nm in that chart.)
G) Repeat on the other side
- Keep the engine supported.
- Replace the second mount the same way.
H) Final checks before lowering
- Ensure all fasteners are torqued.
- Inspect for clearance around:
- exhaust/downpipe
- radiator shroud / hoses
- throttle and choke linkage
- carb/manifold area (movement here is exactly what good mounts help control)
I) Lower the car and road-test
- Lower engine support jack.
- Lower vehicle off stands.
- Start the engine and observe:
- excessive rocking at idle
- new noises or knocking
- Short test drive, then re-check fasteners for tightness
Quick troubleshooting after install
- Vibration worse than before: mount orientation wrong, one mount not seated flat, or an engine steady/tie-bar is worn.
- Bolts won’t line up: engine needs to be supported slightly higher/lower; don’t force threads.
Clunk on take-off: check lower tie-bar bushes and top engine stay-bar bushes for excessive wear.